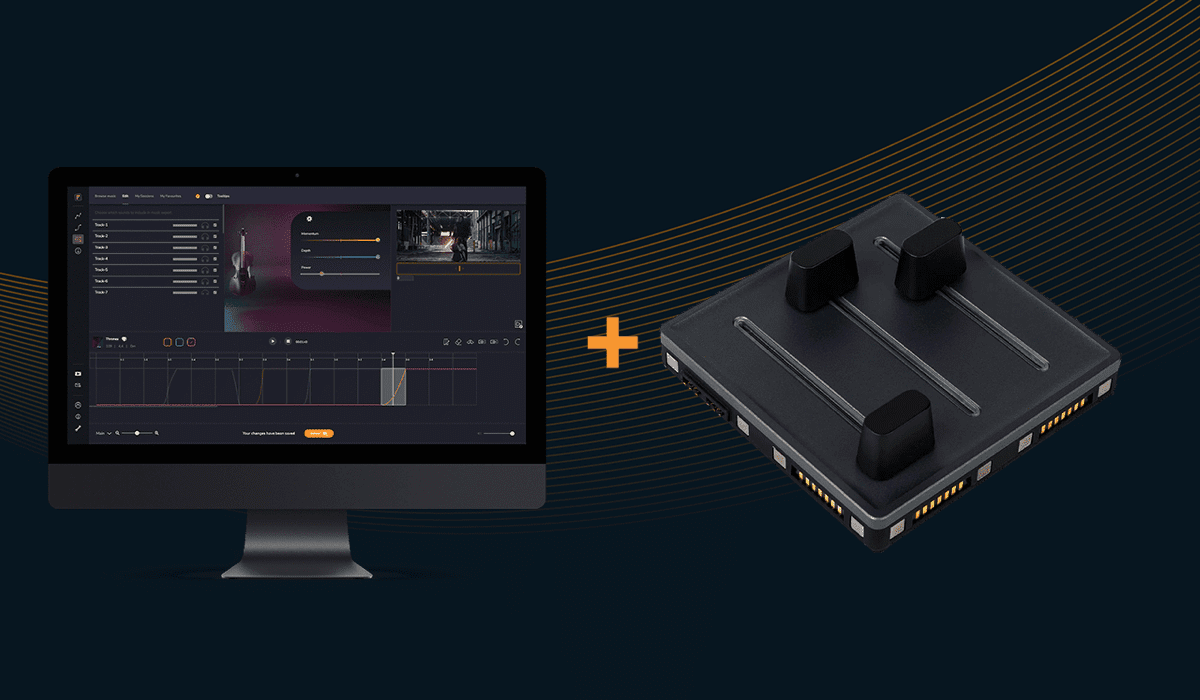
Did you know that you can connect your existing MIDI hardware controller to Filmstro’s Web App to take full advantage of its dynamic music-editing features? With Web MIDI, you can control the power, momentum, and depth of Filmstro’s music tracks directly from your hardware, offering a tactile and precise way to customize your soundtracks. Whether you’re already familiar with MIDI devices or just getting started, it’s surprisingly easy to integrate your controller into our web app.
Here’s how to connect your MIDI controller and start creating custom soundtracks with ease.
Step 1: Ensure Your Browser Supports Web MIDI
First, make sure you’re using a browser that supports Web MIDI. Chrome, Edge, and Opera are the most popular browsers with built-in Web MIDI support, so we recommend using one of these for the best experience.
Step 2: Connect Your MIDI Controller
Physically connect your MIDI hardware controller to your computer via USB or Bluetooth, depending on your device. Ensure that your controller is powered on and detected by your system.
Step 3: Open Filmstro’s Web App
Head to Filmstro’s Web App and log in to your account. Once inside, load a track from our library that you want to start customizing.
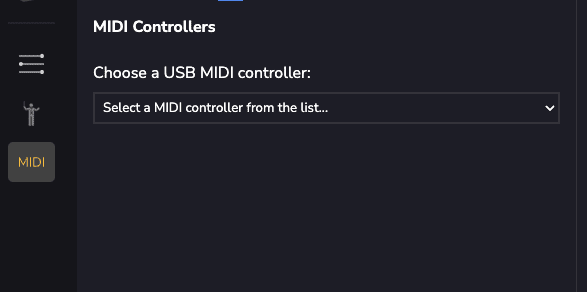
Step 4: Enable MIDI in the Filmstro Web App
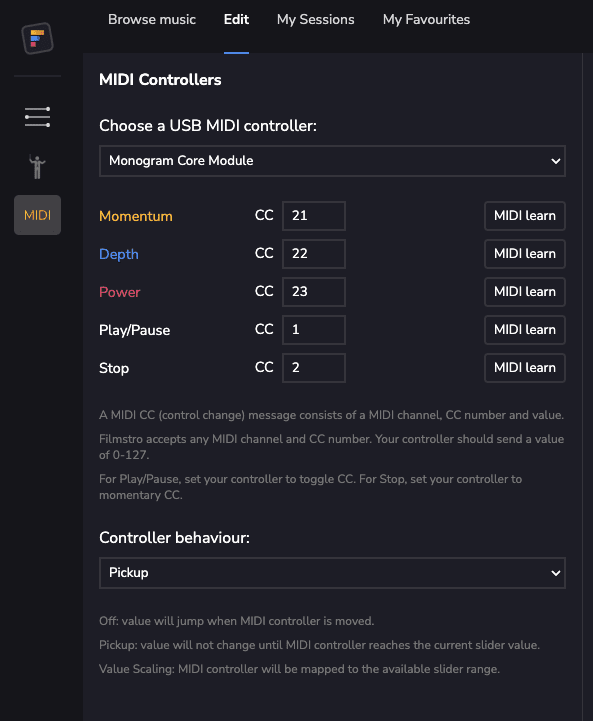
Navigate to the MIDI settings menu within the Filmstro Web App, located in the Edit Tab side bar. Filmstro will automatically detect your connected MIDI device, and you’ll be able to choose your device from the drop down menu.
Step 5: Map Controls and Start Customizing
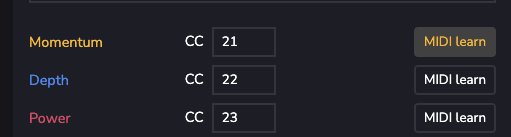
Once your device is connected, you can map your controller’s knobs, sliders, or pads to Filmstro’s signature three scoring sliders: Power, Momentum, and Depth. For example:
-
- Assign a knob or slider to Power to control the intensity of the music.
-
- Map another control to Momentum to adjust pacing.
-
- Use a slider or dial for Depth to fine-tune the emotional resonance.
Step 6: Map Controls and Start Customizing
To map your controls you have 2 options.
-
- Use MIDI learn to automatically assign a controller to one of Filmstro’s parameters. To do so, simply click ‘MIDI learn’ then move the chosen controller and then click ‘MIDI learn’ again. This should now have mapped that controlled to the chosen parameter.
-
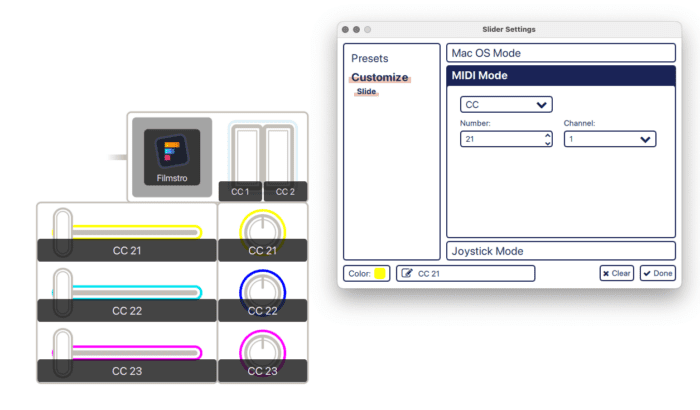
- Manually assign controllers using your controller’s set up wizard or included software package. For example with MonogramCC’s controller software we are able to map specific cc channels to each slider in Filmstro.
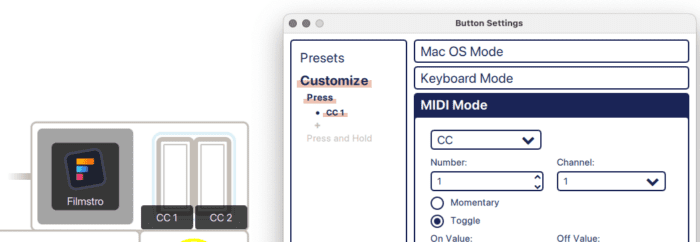
Step 7: Add the play/pause toggle and stop/return key (optional)
Once you’ve assigned the 3 scoring sliders to your hardware device you can leave it there or take it one step further by adding the play/pause transport control and the stop/return to timeline start as well. If you do not wish to do this step you can still use the space bar to play/pause and the return key to go to the start of the timeline.
Please note that play/pause requires the signal to be set to ‘toggle’ instead of ‘momentary’.
For the stop/return command it’s the reverse, so please choose ‘momentary’ instead of ‘toggle’.
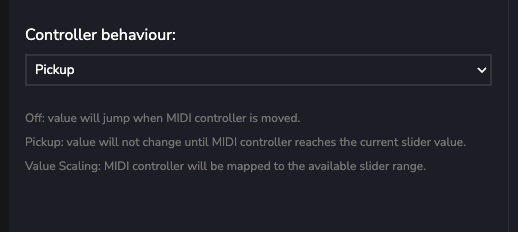
Step 8: Choose the most appropriate MIDI behaviour for your device
Now that your MIDI controller is mapped to the scoring sliders, you need to choose the best controller behaviour from the drop down list in the Filmstro MIDI settings panel. There are 3 options:
-
- Off: value will jump when MIDI controller is moved (we recommend not leaving it on this setting and choosing one of the following based on your controller).
-
- Pickup: value will not change until MIDI controller reachers the current slider value (best if you’ve connected a slider or fader controller with a finite range).
-
- Value Scaling: MIDI controller will be mapped to the available slider range (best if you’ve connected a continuous/infinite rotary knob/dial).
Step 9: Fine-tune Your Soundtrack in Real Time
Now that your MIDI controller is fully mapped and ready to go, you can use it to adjust the music in real-time, giving you a more intuitive way to interact with the soundtrack. Want to build suspense in a scene? Increase the Power and Depth at just the right moments. Need to reduce the tension? Simply dial back the controls.
Using a MIDI controller with Filmstro’s Web App allows you to create custom, cinematic soundtracks in a more hands-on, immersive way. Whether you’re editing a video, crafting a podcast, or working on a film project, integrating your MIDI hardware offers you greater control over the music, enhancing your creative workflow.


