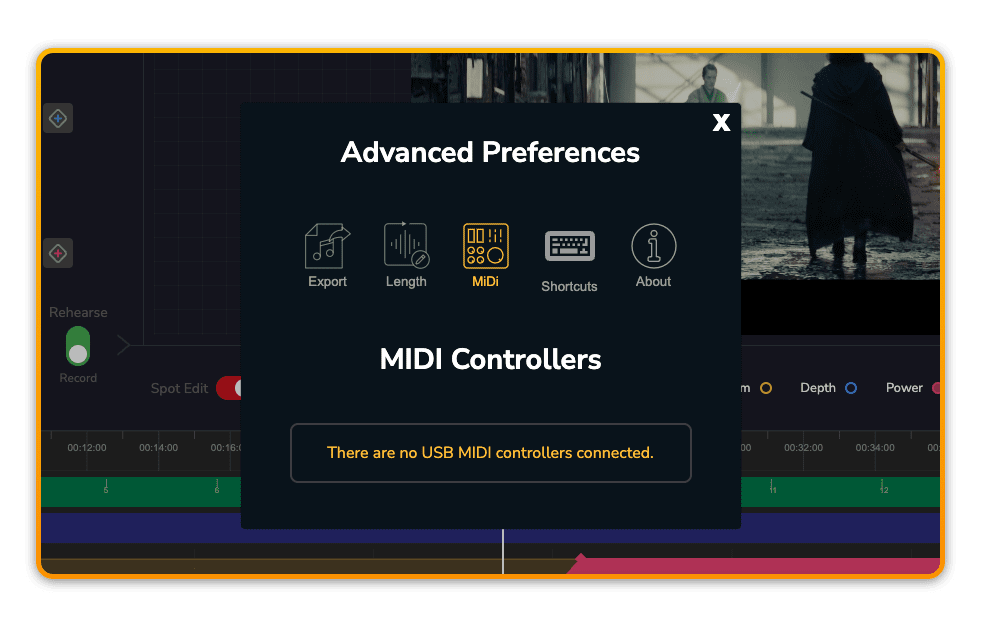
MIDI Controllers
The MIDI settings allow you to add a hardware controller to drive Filmstro Pro’s Scoring Sliders. You can also use hardware to control the Transport.
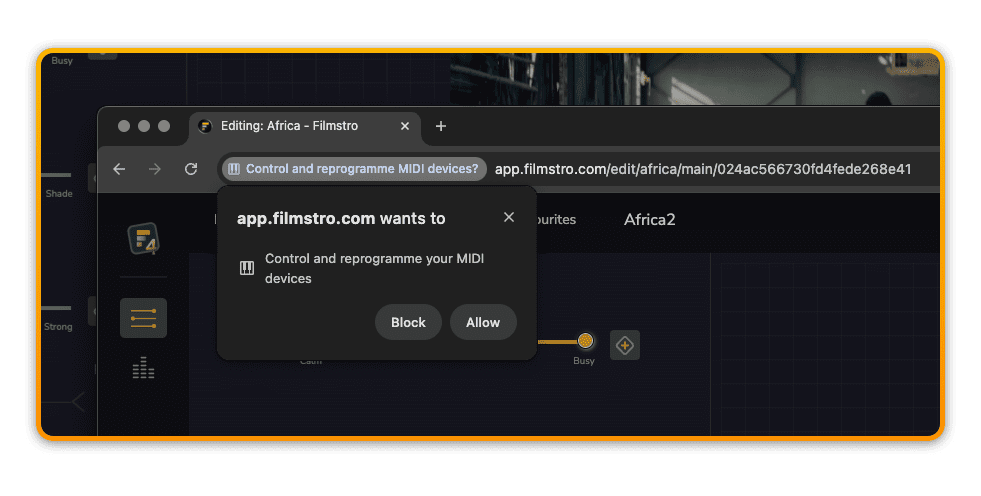
Permissions
On initial load Filmstro will ask permission to access any connected MIDI controllers. Please click ‘Allow’.
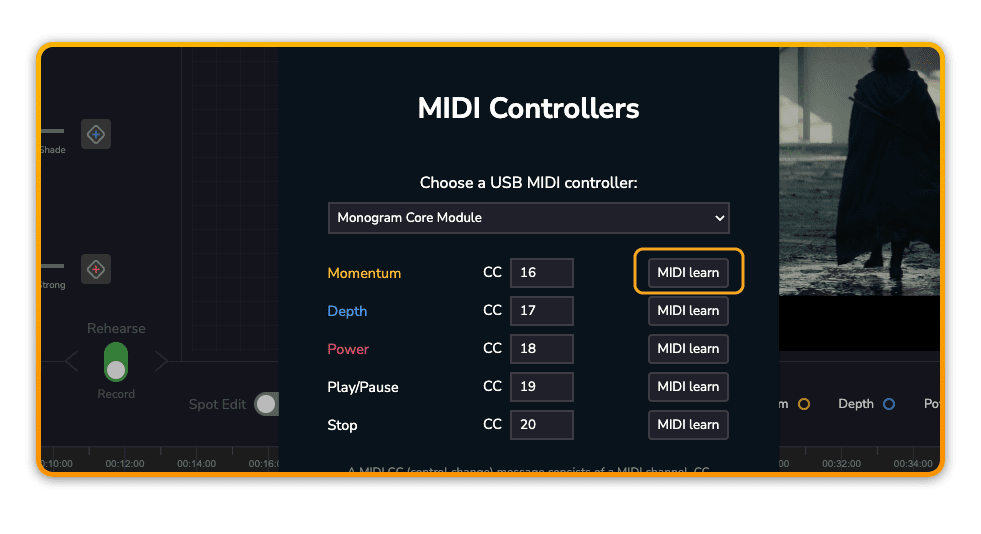
Select controller
Once connected you will have the option of selecting your hardware from the list.

Assign MIDI controllers to Filmstro’s Parameters
The most important step is to map your hardware controllers to Filmstro’s 3 main parameters. You can also map Play/Pause and Stop/Return.
?For Play/Pause and Stop/Return to work correctly, you need to set Play/Pause to ‘toggle’ and Stop/Return to ‘momentary’. If your hardware controller does not include software in which you can make these changes, then don’t worry. Most filmmakers prefer to use the K and L keys and/or space bar and return key to control playback.
MIDI Learn
The fastest way to connect your hardware to a Filmstro parameter is to use the MIDI learn function:
Click Midi learn.
Then move your controller.
Then click MIDI learn again.
Your controller should now be mapped and connected to the Filmstro parameter.
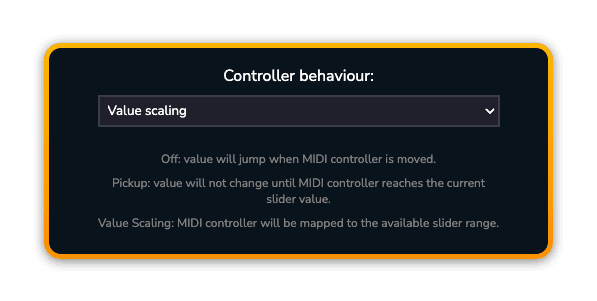
Controller behaviour
There are 2 settings to choose from to ensure the best behaviour when using hardware controllers:
Pick up
Pick up is recommended if you’re using a physical hardware controller with a finite range (e.g. a slider with a position at hard-left and hard-right).
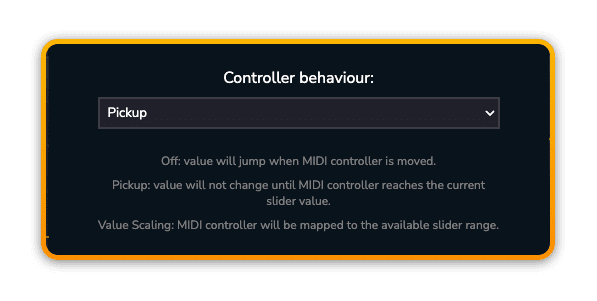
Value Scaling
Value Scaling is recommended if you’re using a physical hardware controller with an infinite range (e.g. a continuous controller knob or rotary dial without hard limits).
?It’s best to experiment with these if you’re not sure to find out what works best for your particular equipment.