Colour grading footage inside FCPX:
When editing your footage using Final Cut Pro X, it’s always nice to colour grade it to the highest level, in order to really get the most out of your edit and give it that cinematic finish it deserves.
With the new and improved colour correction tools, Final Cut Pro X has really impressed us over the years. Now you’re able to edit with the most intricate colour grading tools to add something extra to your footage.
In this article, we will look at the best methods to ensure you are colour grading your footage to its full potential.
Let’s have a look at how you can colour grade with Final Cut Pro X to the highest level.
Your initial footage
This first point is actually nothing to do with Final Cut Pro X but it is essential to ensure you are able to colour your footage to the highest possible level.
Before anything is done in post-production, you must ensure that the footage you’ve shot is as clear and of the highest quality, you could possibly reach.
This is so in post-production you can work at bringing the colour to life and changing the exposure, temperature and other components to achieve that cinematic look.
Good quality footage is the anchor to this method.
Colour Correction
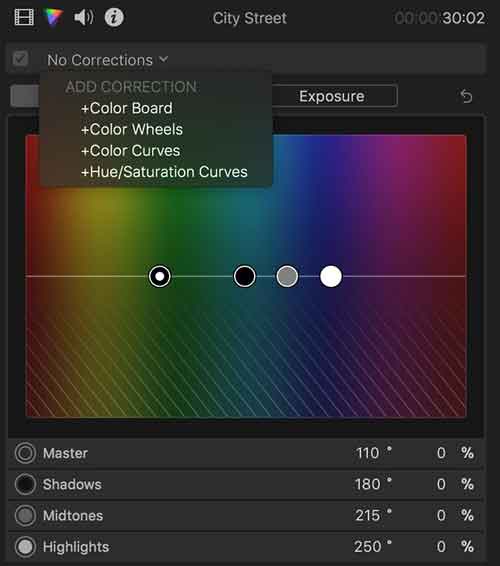
This is essentially the first layer of colour when editing your footage. Colour corrections can be anything from adjusting the white balance to adapting the exposure levels.
You can also use pre-built LUT’s in the “Inspector Panel”. Once you’ve used one of the LUT’s you can still change and make additional tweaks to the colour correction until you are happy with the finished product.
*a LUT is known as a ‘Look Up Table,’ this holds a set of numbers which are looked up by Final Cut Pro X in order to change the colours of an image.
Colour grading your footage
Next up is colour grading your footage. This is finalising the tweaks and changes you’ve made whilst colour correcting the footage. Here is where you get that cinematic feel and look.
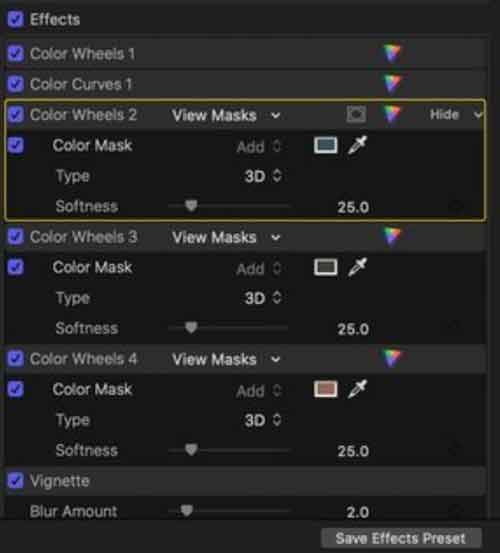
In this part of the colour grading process, we utilise colour masks, colour wheels and the other intricate colour grading tools to add depth and isolate specific colours you wish to flourish in your film.
You can create real contrasting colours that pull the footage up to the next level, making it stand out and giving it that cinematic feel you’ve been looking for.
Finally, revise your colour grading session
It’s really healthy to take a step back and give yourself a few hours away from the screen to really evaluate your work and make corrections to the edit.
Taking a step back allows you to reset and see if there are any scenes or parts to the film where you may have over-egged the colour grading and it looks a bit too superficial.
Once you have made the corrections, you can export your movie!
Don’t forget to save these colour corrections as a template as these can prove to be very efficient when developing a base to your colour correcting adventures.
To do this simply press Cmd+C, then select the clip on the timeline that you wish to add effects to. Once selected, click Command+Option+V and paste this to effects.
—-
We hope you enjoyed this article, don’t miss out on any of our other blogs! Sign up to Filmstro and follow us on Twitter, Facebook and subscribe to our Youtube channel.


