
How to record a voiceover on Premiere Pro –
Getting a good quality piece of audio recording is crucial for any audio or video project. These days, videos with voiceovers in the background are a popular choice for many creators. It helps creators add a personal touch to their work and make more in-depth content.
This style of video is mostly used for tutorials, walk-throughs, breakdowns, and listicles, among others. For these, you’ll need a crisp voiceover recording that does your project justice. Adobe Premiere Pro is one of the most popular recording tools out there; it’s the go-to tool for 9 million users worldwide!
But why Adobe Premiere Pro?
In this article, we’re going to break down some of the best features of Adobe Premiere Pro that make it such a favorite among creators.
Adobe Premiere Pro: Best Features
Here’s a quick breakdown of some of Adobe Premiere Pro’s best features.
1. Direct Recording
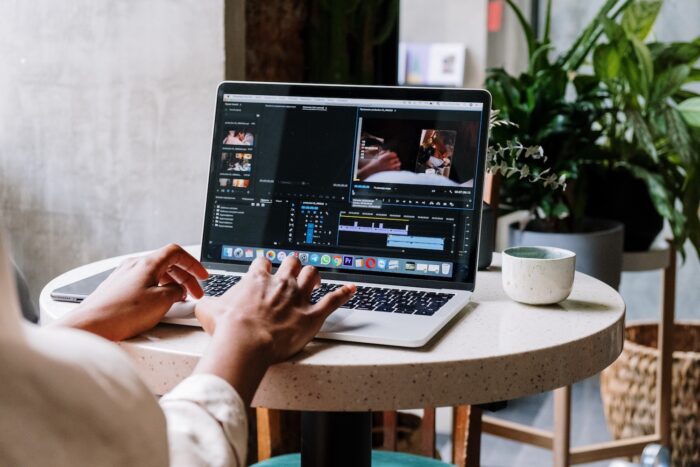
Adobe Premiere Pro lets you record voiceovers directly over a video sequence. This eliminates the hassle of recording a voiceover separately and overlaying it carefully over video. When you do that, there’s always room for error. The video and audio can seem out of sync when attaching a separate recording to your video sequence.
With Adobe Premiere Pro’s direct recording feature, you can record your voiceover while viewing your video sequence, letting you shape the audio perfectly to it.
2. Audio Workspace
Adobe Premiere Pro has a separate workspace for audio editing, making it incredibly easy for you to edit your audios on the spot without switching to a separate software. You can use the wide variety of options in the audio workspace to improve the sound quality, whether it’s music or dialogue.
Moreover, you can create custom workspaces within the software to edit separate projects at once!
3. Audio Keyframes
Adobe Premiere Pro lets you identify and edit different keyframes, such as audio. Keyframes contain independent settings that you can play around with to edit your project how you want. You can also create keyframe marks and delete specific keyframes to adjust your audio.
Adobe Premiere Pro is so popular because of the depth of features it offers its users. Plus, the pricing isn’t bad either.
Here’s a quick breakdown.
Pricing:
Adobe Premiere Pro has annual and monthly plans, so you can choose the one that works best for you.
- $239.88/ year
- $20.99/ month (requires annual commitment)
- $31.49/month
If you don’t feel like committing to a subscription, we get it, and so does Adobe! That’s why they have a 7-day free trial, so you can try out Premiere Pro’s amazing features without any commitment.
If you’re a creator looking to up your voiceover game, Adobe Premiere Pro is the tool for you. The only con we’ve noticed is that there’s a learning curve for beginners in terms of software navigation. This is where we come in.
Here’s a quick tutorial on how to record a voiceover on Premiere Pro.
How to Record a Voiceover on Premiere Pro
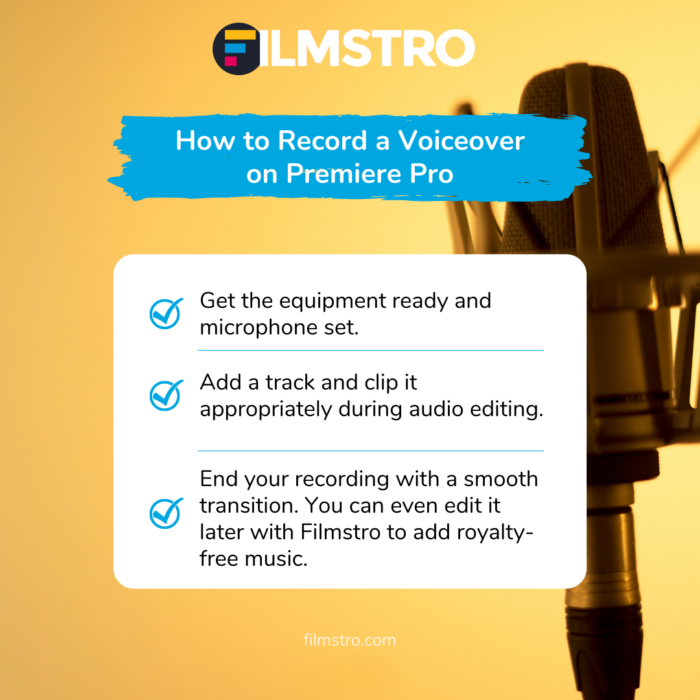
Here’s a step-by-step guide on recording a good quality on Premiere Pro.
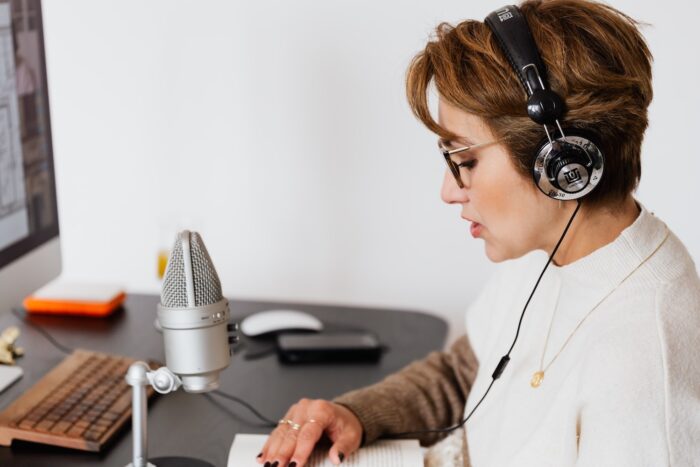
1. Get the Equipment Ready
The first thing you need is a microphone—the better the microphone, the better the audio recording. However, you can always go about improving the audio in the editing process.
Get your microphone ready, and ideally, you should be sitting in a space that cancels out as much ambient sound as possible to eliminate background noise in your audio. Even if you don’t have a microphone, you can use the in-built microphone from your laptop to record your voiceover.
Once your microphone is ready, go to Preferences in Premiere Pro. In preferences, click on Audio Hardware and then Default Input. Default Input will open a drop-down menu for you, showing you all the audio hardware your computer is recognizing; you can select your external microphone or the in-built microphone accordingly.
2. Add Track
Once you are ready to record yourself, you need to create a dedicated track. You can do this by right-clicking on an existing audio track, and choosing the “Add Track” option. Another way of doing this is to select a track that already exists but is empty so that you can put your own recording.
If you are able to execute this aspect properly, you should be able to see the track’s meter move. This means that the microphone is now registering and picking up the sounds. Here, you must test the sound you are about to record without actually recording it. The primary reason behind this is that if you know that the audio is not problematic, you can save a lot of time on post-recording editing.
Also, a little warning: look out for clipping!
If you see that the audio levels have reached the top of the meter, it means that there is clipping – which means that you have to lower the volume of the mic from the source itself.
After you’ve tested your sounds, you can actually record the voiceover.
3. End Recording
After you’ve recorded your voiceover, press the spacebar to end the audio recording. The file is automatically saved in an auto-generated folder; Adobe Premiere Pro Captured Audio. And that’s it; yes, it’s that easy.
Now you can edit your voiceover in a separate audio editing tool or use the built-in audio editing options in Premiere Pro. You can now add additional effects, ambiences and music to your project, to give it life.
One of our personal favorite music tools is Filmstro, one of the biggest online databases for royalty-free music.
Final Takeaway
Premiere Pro is an excellent tool for filmmakers, vloggers, and video enthusiasts. The voiceover feature is just one out of the hundreds of amazing features it offers. It might be a little intimidating to navigate at first, but once you get the hang of it, you can do great things with it. So – do your research, and learn.
Don’t worry, you won’t have to go too far. We’ve got you covered with all the audio and video editing information and resources you need. Filmstro is always here to help you, so make sure you visit the blog for more helpful tutorials like these.
If you liked this article, you should also check out Things To Know About Audio Editing
We hope you enjoyed this article and don’t miss out on any of our other blogs! Sign up to Filmstro and follow us on Twitter, Facebook and subscribe to our Youtube channel.
You can also check out some of our amazing royalty-free music today by clicking here.


