How to export a high-resolution movie in Final Cut Pro X:
Final Cut Pro X is one of the leading video editing software for filmmakers. It’s important for filmmakers to understand the best practices to ensure you are exporting your finalised video at the highest level but in an efficient manner.
In this article, we will take you through the steps to achieve this.
How to export a high-resolution movie in Final Cut Pro X
Right, let’s go through the key steps to ensure you’re exporting your films out of Final Cut Pro X in the most efficient manner and at the highest level.
Firstly, select the project you wish to export
You’ve finally finished your project, let’s get this selected ready for export. Simply select this with the shortcut Command + 0 to open up the project library, then select your project you are exporting.
Now, you open the export window
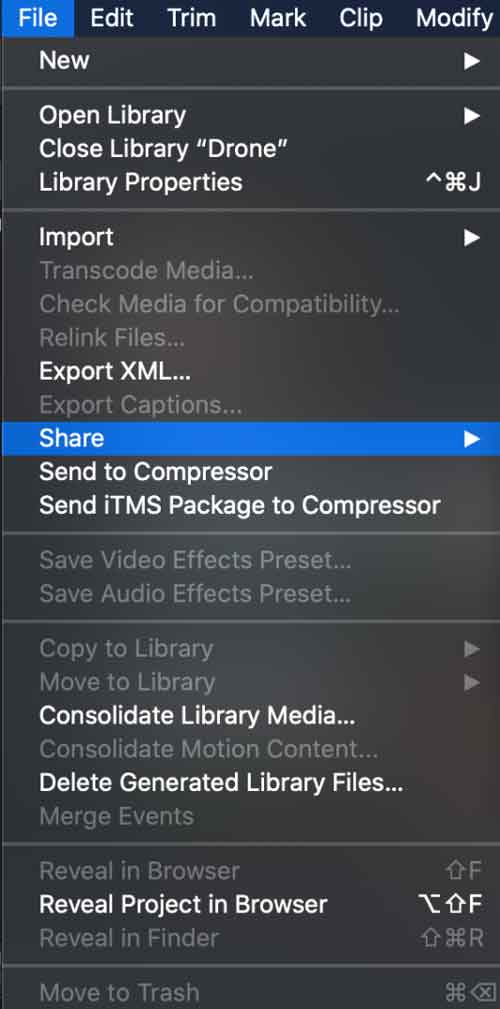
There are a few options to do this, firstly you can click File > Share > Master File (Default). The next is to simply click Command + E, this will pop the export window in seconds – my personal favourite.
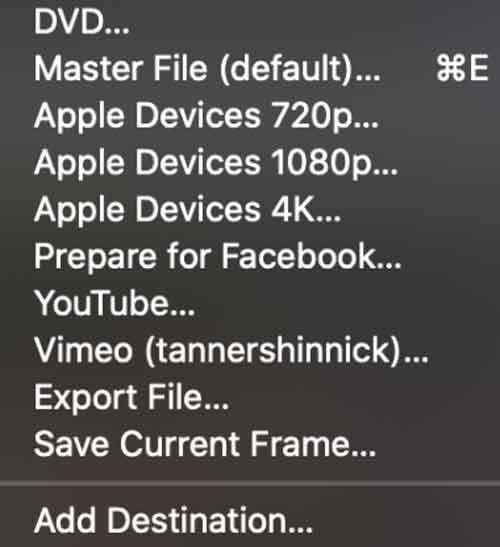
Or you can just click the share button which offers you the opportunity to export, pretty quickly too. You can access this at the top of the program whilst editing (See below).

Next, you will want to choose your export settings
Choose these settings wisely. In the dialogue box, you can choose to change the export settings by either selecting the current settings, or you can alter them to suit your preferred codec.

You can select anything up to ProRes 4444 XQ but this is a ridiculously large file and will be pointless for most. If file size is not a concern to you then it’s definitely worth exporting at this size.
If like most of us the file size is a concern, then exporting at a high-res H.264 QuickTime is the best option as it is efficient and provides a high-quality finish for you to display your film.
Now you’ve decided on your settings it’s time to export!
Now you can select your final file destination
To select your final file destination, all you need to do is select Next and then choose where you wish the file to be saved on your Desktop, external drive, memory stick and so forth. Now you need to find your destination, then click Save. Now the export will proceed.
Once the export has completed, you’ll receive a pop-up. Click on Show to view your export.
That’s it, you’re done. You are ready to show the world your exported clip!
—-
We hope you enjoyed this article, don’t miss out on any of our other blogs! Sign up to Filmstro and follow us on our Twitter, Facebook and YouTube channel.


