How to add and implement transitions In Final Cut Pro X:
Whilst a lot of you may be familiar with Adobe Premiere Pro and Da Vinci Resolve, others may be starting to explore other avenues when it comes to video editing software. Over the last couple of years, Final Cut Pro X has started to become increasingly more popular and has now established itself within the video editing world.
In today’s article, we are going to delve into how you can add and implement transitions in Final Cut Pro X with ease.
What are transitions?
Transitions are a connection between two scenes or two clips that allow you to smoothly connect on to each other.
They are an extremely powerful way to make an impression on your audience and grab their attention by allowing the story to flow in a smooth and exciting manner.
Let’s have a look at how Final Cut Pro X allows you to apply exciting transitions.
Apply the transition from your browser
To apply the transition from your browser, simply click on the Transitions icon and select any transition you wish to use. Once selected you can drag this down onto your timeline and place on the preferred clip.
Now, place the transition between the two clips and head to the “Inspector” window. In the Inspector window, you’ll be able to make changes to the transition to ensure it flows smoothly and doesn’t give off any jolty stutters.
Apply the transition with a shortcut
The next way you can apply the transition is to apply it using the shortcut method. To apply the transitions using the shortcut method, simply click on the cut between the two clips.

Then ensure the clips are touching, as Final Cut Pro X will not allow the transition to be placed in there if they are not. Use the Magnetic Timeline as this ensures clips touch at all times.
Now press the shortcut Command + T and this will now apply the default transition to your timeline – this is a cross-dissolve transition.
Blending your transition
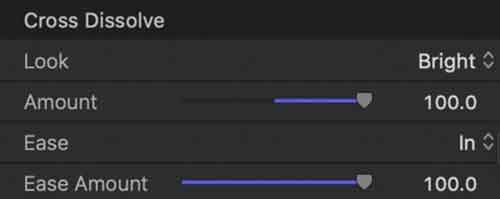
The blending mode in Final Cut Pro X offers a simple but effective way to alter your transitions to give them a unique look and feel.
The default mode for blending is set to video but you can also change this depending on which format suits best for you.
To use this function click Command + 4, and this will pop up the Inspector panel. In the Inspector panel, you will be able to experiment with all the different types of blending modes to see what suits your transition.
You can also alter it even further by utilising the keyframes in the Inspector window. This will allow you to change up the natural dissolve of the transition.
Don’t forget to activate the duration box

The duration box is great to see timeframes but also allows you to change the duration as you please.
To activate this, simply click on the timeline and choose transition. Then select the transition in the timeline, then use the shortcut Control + D.
Now you can select the transition in the timeline, then double-click the Timecode box to change it to the Duration box.
Finally type in the new duration, which is counted by frames, frames per second.
—-
We hope you enjoyed this article, don’t miss out on any of our other blogs! Sign up to Filmstro and follow us on Twitter, Facebook and subscribe to our Youtube channel.


