A quick guide to understanding infrared cinematography –
Infrared cinematography is a great way to push artistic boundaries in filmmaking. With a regular camera, we only get a picture of how we see the world. The colours in the picture are familiar to what we have seen before, but you can unlock a whole new way of looking at the world with infrared photography. This technique can be a great creative tool for filmmakers.
With infrared cinematography, filmmakers can work with a whole new spectrum of light that is not visible to the naked eye. With this technique, you can make films that explore new visual concepts, and you can use this visual technique for your storytelling.
The infrared landscape can be difficult to explore however this article will guide you on how to perfect the art of infrared cinematography and how you can use this technique to enhance your filmmaking abilities.
Let’s get started.
What Is Infrared Light?
Before we get into infrared cinematography, it is important to understand how infrared light works.
On an electromagnetic spectrum, infrared light goes beyond our visible colour spectrum. Take a look at the figure below.
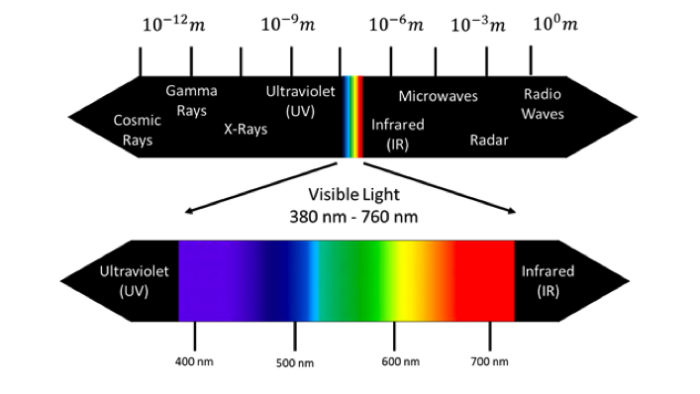
The electromagnetic spectrum is a scientific phenomenon that makes it possible for people to see colours. The colours of visible light are created by a change in frequencies. In a decreasing wavelength order, we see the colours red, orange, yellow, green, blue, indigo and violet. The human eye can only see between 400 to 700 nanometers in numerical terms.
Visible light only accounts for a small part of the electromagnetic spectrum. Beyond the violet light lies ultra-violet (UV) light. Ultra-violet light is visible to some birds and insects, and this type of light is typically associated with sun damage causing light. At the other end of the spectrum, beyond the red light, is infrared light. Infrared is usually associated with night vision and thermal imaging.
Wavelengths beyond the red light are much longer and slower. Infrared light is even slower than the slowest red light visible to the human eye. This slowness makes it completely undetectable to us.
Modern digital cameras can record the full light spectrum between 300 to 1200 nanometers, but this does not produce realistic images. To create a realistic image, digital cameras have a standard light sensor that uses a special filter to block most light outside the visible range.
What Is Infrared Cinematography?
Infrared cinematography creates images by capturing a different type of light that people cannot see. You can create infrared visuals through a digital sensor or light-sensitive film. For a camera to produce infrared images, you will also need a filter to block out the UV light.
You can create visual recreations of Infrared light through analog SLR cameras, external IR filters for DLSR cameras and modified digital cameras. Infrared filters can create images that mimic in-camera effects. You can create false colour or black and white cinematography or create images that appear dreamlike and lurid.
History Of Infrared Cinematography
Infrared cinematography is not a newly found technique; instead, this type of filming has been in use for quite some time now. Infrared sensitive filming was first developed during World War 1 by the United States. This type of filming was essential to wartime efforts as it improved aerial intelligence photography. Infrared light made it easier to detect the heat source of enemy soldiers and vehicles.
After the war, infrared photography was used by astronomers in the 1930s. During this decade, infrared photography became popular amongst many photography enthusiasts. Photojournalists would often use Infrared for landscape and aerial photos. In the film industry, infrared cinematography was used to create a day for night effects in movies.
Infrared photography saw a resurgence in the 1960s by many musical artists. Artists such as Jimi Hendrix and Frank Zappa used infrared for the album covers to fit the psychedelic aesthetic of the 1960s. Nowadays, we use Infrared for aerial forest surveys.
What Are Infrared Filters?
If you want to start using infrared photography, you need to use an infrared filter. Many regular optical filters come with infrared filters that block infrared light. To film with IR, you need a specialised lens.
Without infrared filters, cameras record superimposed images from visible and near-infrared light. Light transmitted to the sensor increases substantially, and because infrared is recorded by all three colour channels, colour saturation typically decreases in your picture.
For a more striking infrared look, you should use IR pass or ND filters to reduce the amount of visible light showing up on the image. You can use filters such as the Hoya R72, B+W 092, Wratten 89b, etc. These filters will improve your picture’s contrast.
Benefits Of Infrared Cinematography
Infrared cinematography is a useful tool for many different industries. In the film industry, Infrared can create visual aspects that enhance your storytelling. You can create photo effects with infrared that doesn’t require additional editing. Infrared makes it possible to expand a filmmaker’s artistic abilities. Having the most creative tools is highly beneficial in a visual medium such as film.
As mentioned above, infrared photography is incredibly valuable to the space industry. IR photography can detect invisible light, making it easier to study celestial bodies. This technique can be used for space-based motion pictures.
How To Create Infrared Cinematography?
Before you begin shooting in infrared, familiarise yourself with the basics first. Once you’ve understood the basics, here’s how you can film with Infrared.
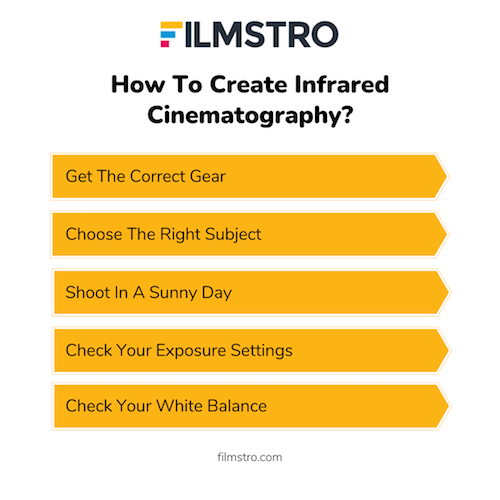
1. Get The Correct Gear
It is important to have the right equipment before you begin taking IR photos. Without the right gear, you won’t be able to get your desired result. Here is some essential equipment you need:
● A Converted Infrared Camera
A converted camera is one of the best gear for infrared cinematography. You can get your IR blocked professionally replaced if you already own a non-converted digital camera.
By adding an IR filter, you will have a converted infrared camera. Converting your camera is a permanent change, and you cannot use it for photography again. Converting your camera is also an expensive process.
● Infrared Filters
Getting an infrared filter is more affordable than converting your camera. You can attack an infrared filter to the front of your regular camera’s lens. Different filters capture the different portions of the infrared spectrum. When you are choosing the type of filter you want to buy, focus on the specs and the type of effects you want.
● Tripod
You need a sturdy tripod such as a tripod designed for DLSR cameras. A tripod is necessary as you will be dealing with long exposures. A lightweight or travel tripod may ruin the quality of your film. If you plan on doing landscape cinematography with infrared, a tripod is a must.
2. Choose The Right Subject
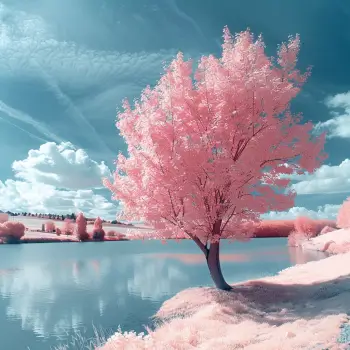
Most infrared cinematography features landscapes because they produce the most appealing results. The chlorophyll in leaves makes trees and forests glow when captured with infrared light.
You will get a very dramatic image if you pair your landscape against the night sky. The darkness absorbs all the infrared light, making your landscape subject stand out. Your infrared photos will look very surreal, so choosing a subject that fits this theme is important. You can also photograph people and architecture for great results.
3. Shoot In A Sunny Day
Many filmmakers and photographers enjoy using the light from golden hour to light up their photos.
However, if you are filming with an infrared camera, you should film when the sun is shining bright. A bright sun will give you lots of infrared light to work with and produce the highest quality infrared film.
4. Check Your Exposure Settings
Your exposure setting will vary depending on the camera you are using. It will also depend on the lens and the light conditions of your scene. Set your image format to RAW, which will give you more flexibility with editing. If you use a normal camera for infrared photography, you need to use a slow shutter speed to make very long exposures.
Always keep your ISO on a lower value whenever possible. A wide aperture minimises the shutter speed time and ISO value when it comes to aperture. This will also get rid of flare problems.
5. Check Your White Balance
Your camera’s white balance is calibrated to the visible part of the light spectrum. When you use an infrared filter, your presets will be lost.
However, a mode called custom white balance will help you with IR cinematography. To adjust your settings, take a picture of a subject with even lighting.
Once you do that, go to the white balance settings in your camera and use this picture for your custom white balance mode.
Tips For Infrared Cinematography
Now that you know how to create infrared films, here are some helpful tips to keep in mind while shooting IR.
1. Focus
Infrared light focuses at a different distance than visible light. You might see some types of chromatic aberrations appear, like bluish or purplish marks around the edges of high-contrast objects. Although most regular lenses are designed to fix this issue, many of these modes do not work with infrared.
If an IR filter is not used to block visible light, you might need a smaller aperture than normal to ensure both visible and infrared light is in focus. You can always verify your focus by zooming in using the on-screen camera tools.
2. Sharpness and Diffraction
Diffraction happens much quicker in infrared light than in visible light. Due to this, smaller apertures can ruin the finer details in your film.
3. Artificial Lightning
Both studio and outdoor lighting have different effects on Infrared film. If your studio uses traditional tungsten bulbs, you will get peak infrared emissions. However, studios are using newer and more efficient light sources, which produce less infrared emissions. If you want to get outdoor lighting exposure indoors, you can use strobe lighting, which is supposed to mimic sunlight.
4. Genre
Infrared cinematography works best for films that want to create a surrealistic environment. If you want to create a visual piece of work that focuses on surrealism, infrared will work best for you.
Final Takeaway
Infrared cinematography opens up a world of creative possibilities for filmmakers. With IR filmmaking, you can immerse your audience into a visual experience their eyes would never see.
Before you begging shooting with IR, familiarise yourself with the equipment and follow our tips to create visually stunning works.
If you liked this article, you should also check out Professional Video Editing
We hope you enjoyed this article and don’t miss out on any of our other blogs!
Sign up to Filmstro and follow us on Twitter, Facebook and subscribe to our Youtube channel. You can also check out some of our amazing royalty-free music today by clicking here.


