A hyperlapse is a form of a time-lapse technique that allows the photographer to create motion shots by manually moving the camera between each shot. A hyperlapse is achieved over a much longer distance compared to a standard timelapse by stabilising the camera on a mount or a tripod and capturing complex motion paths.
Tips for shooting the perfect hyperlapse
Timing
Allow a fixed time period to move the camera between each shot. We recommend anything between 10-15 seconds. You must keep this consistent, so if you decide on ten seconds set your time to go off every ten seconds.
Use a Timer Remote
By using a timer remote or a timer of sorts it ensures you get an equal interval between each shot.
Shoot Raw Footage

Always shoot raw as you will want to edit the footage in post-production and occasionally stabilise some of the shots to ensure a smooth transition of each image.
Shutter Speed
Ensure your shutter speed is at least one second. This will help you create a motion blur to each individual image. In post-production, this will help create a much smoother and succinct hyperlapse.
Hyperlapse length
For ten seconds of video, you will need to shoot between 240-250 images – if you are shooting at 60 frames per second. Plan beforehand how long you want your hyperlapse to last. This will allow you to measure each shot and get the timings correct.
Stability
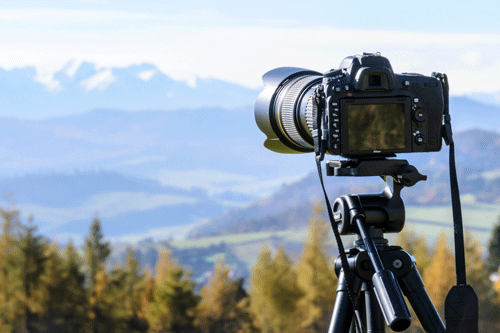
Attach your camera onto your tripod and find a flat surface to place it on – it’s integral to a moving timelapse. This will keep the shots evenly balanced and allows a smooth edit in post-production. However, you may have uneven ground but it’s the perfect setting for your timelapse – instead of balancing the tripod on a rocky, uneven surface look to use a handheld stabilisation tool.
Shoot more than you need
This may seem inefficient and counter-intuitive, but you’ll find you will occasionally encounter footage you just can’t use during post-production. For instance, if you need 5 seconds of footage for a hyperlapse, look to grab around 10-12 seconds.
Post-production Hyperlapse techniques and tips
Lightroom
Import your imagery into Lightroom. Here you will be able to edit the colouring of each image to keep a consistency throughout the hyperlapse. Choose one photo and make your adjustments. To set the adjustments to all images simply make the changes in the development module and then add to the sequence by using the synchronisation command.
Use inside warp stabilizer (After Effects)
You can import the images now from Lightroom in a JPEG sequence. Use this to stabilise all your images. You must set the length of each image to around 0.040 seconds to achieve the 25fps. This will enable you to stabilise the footage correctly. Then run the After Effects warp stabiliser to ensure all shakiness if any is corrected in your hyperlapse.
Final adjustments
Finally, import your stabilised footage into Premiere Pro for final rendering. You can use this to add any final crops and music to suit your hyperlapse. Then you are ready to export!
*For additional hyperlapse material be sure to check out this tutorial*
We hope you enjoyed this article, don’t miss out on others – sign up to Filmstro and follow us on our Twitter, Facebook and YouTube channel.


