If you want to maximize the visibility of your videos or films, you’re going to want to put them on every motherloving video platform there is. So how can you set up guides on a normal 1920 x 1080 canvas size to help you see what it’d look like as a ‘Square’ video? You’ll learn in 4 simple steps:
Step 1: Turn Guides and Rulers on.
Before you can start creating custom guides, you’ll need to turn on the ‘guides and rulers’ by doing the following: Select the program monitor (by clicking on it) and then Go to:
View > View Guides and View > Show Rulers
Step 2: Calculate the distance for each vertical guide.
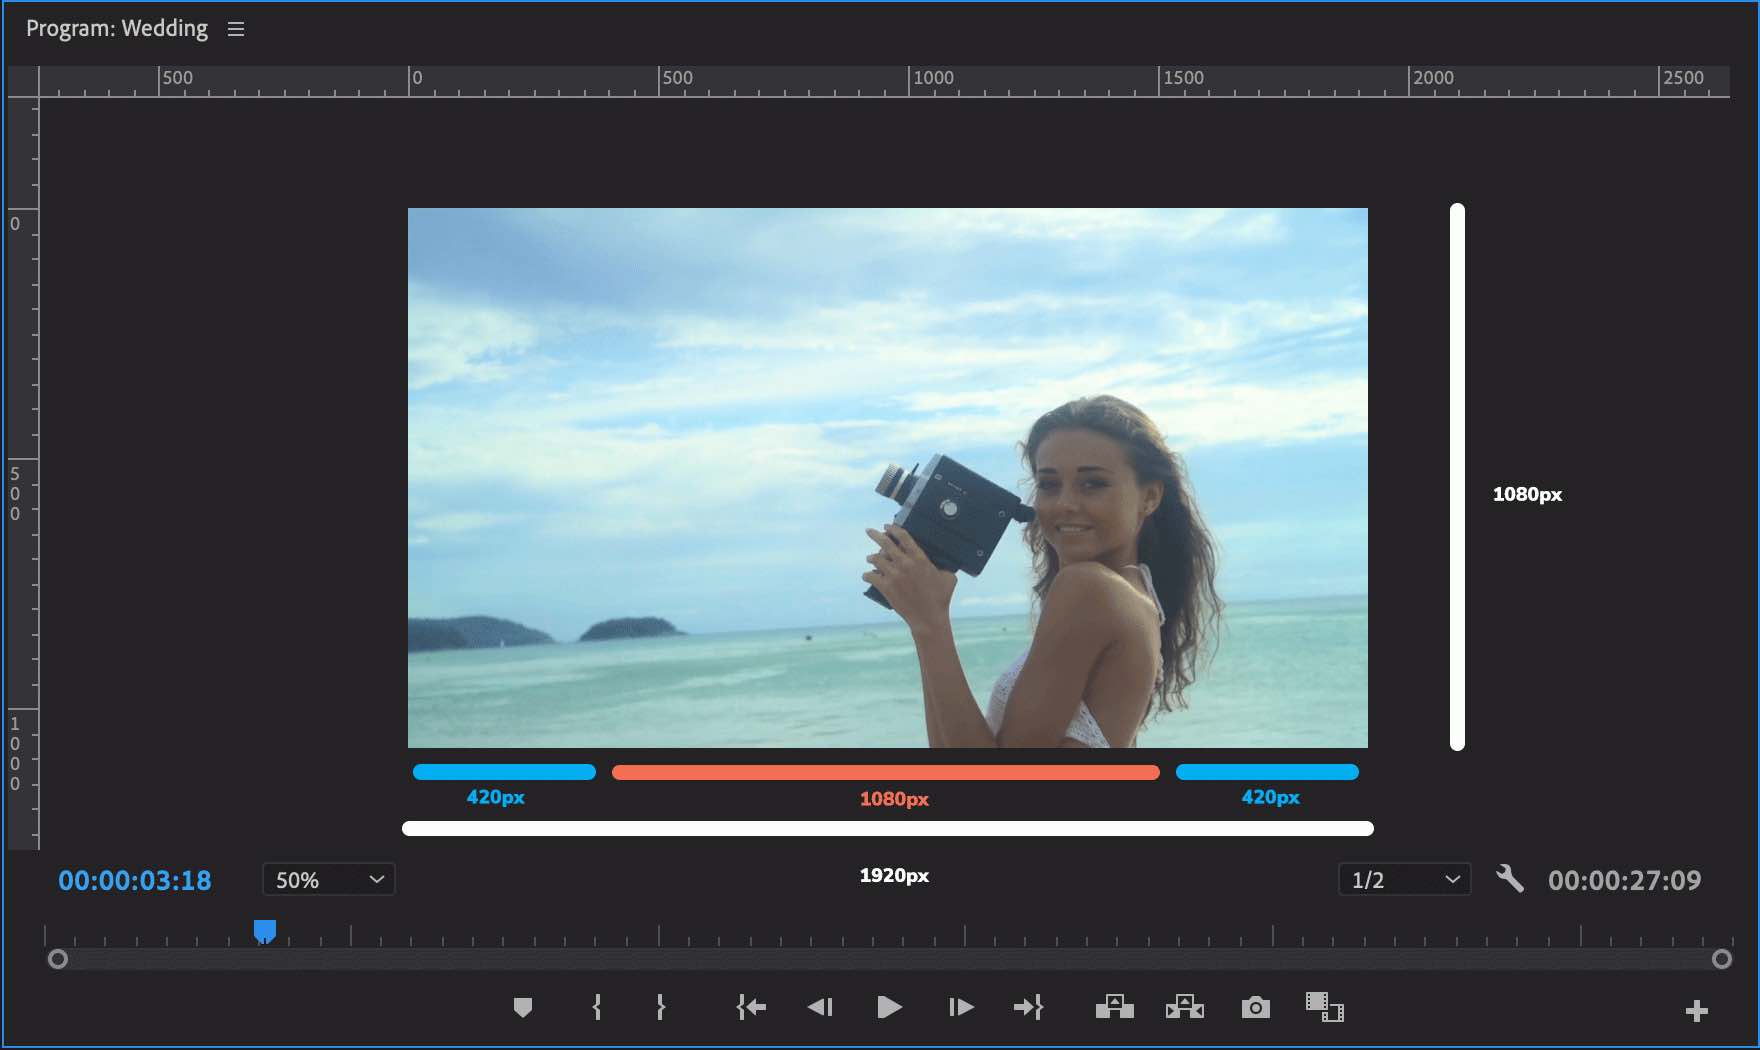
The following is based on the assumption that your video format size is 1920 x 1080 (the same maths can be applied to any video size though).
So the width of the video is measured at 1920 pixels and the height is measured at 1080 pixels. In order for it to be a square, both the height and width need to be the same size (i.e. 1080 pixels). If you deduct 1080 from 1920, you’ll have the amount of extra width that you’ll need to get rid of.
1920 – 1080 = 840 pixels.
You’ll then need to deduct 840 pixels from the width to make it 1080 pixels wide. In order to have the square framing over the centre of your image, you’ll need to split 840 in 2 (420 pixels each) and remove those 2 equal amounts from the left and right side of the screen.
Step 3: Setup the guides and lock it down.
In order to add your guides, you’ll need to go to: View > Add Guide.
You’ll need to then enter the value ‘420’ for the position and select left. Now do the same thing but set it to ‘right’. Please make sure that the units are set to pixels for both.
Alternatively, you can right click on the ruler or drag a guide out by clicking and dragging out from the rulers on the side and above the image.
To ensure that you don’t accidentally move one of your guides, you’ll need to lock them down. Go to; View > Lock Guides. You can also allow text elements to snap the guides by turning on the snap functionality. Go to: View > Snap in Program Monitor.
Step 4: Export to the right size.
To export go to: File > Export > Media
From the Export Settings panel, you’ll need to select ‘video’ and under the ‘basic video settings’ you can uncheck the box that locks the video width and height. Once these have been unlocked, you can uncheck the ‘link’ icon next to the ‘width’ and ‘height’ so when you’re changing these, they won’t stay in ratio.
You can now change the width to 1080. Then in the top left hand corner change the source scaling from ‘Scale to Fit’ to ‘Scale to Fill’.
This is now set up to be exported as a square video for popular social media platforms.
If you found this useful, don’t forget to subscribe to our newsletter and follow us on social media to get the latest updates, news and free music.


