In an ideal world we would all have the perfect environment to record our audio or an interview. However, sometimes that just isn’t possible and we end up with audio that has background noise in it or may be quite echoey. Cleaning this audio up is usually the task of an audio specialist (if we don’t know how to) but we don’t always have the budget for that.
In most cases filmmakers don’t know how to use digital audio workstations such as Adobe Audition or Apple’s Logic Pro but if you’re a filmmaker and are using Premiere Pro CC, we can show you some cool tips on cleaning up your audio without the need for an audio engineer.
Alternatively, if you’re editing away from your main workstation, the browser-based Premiere Pro online tool can handle quick audio tweaks before you dive into the steps below. In most cases filmmakers don’t know how to use digital audio workstations such as Adobe Audition or Apple’s Logic Pro but if you’re a filmmaker and are using Premiere Pro CC, we can show you some cool tips on cleaning up your audio without the need for an audio engineer.
Premiere Pro CC has become the go-to NLE for a lot of creatives due to the huge amount of features that Adobe keep packing in to their new releases every year. You’d be forgiven for not knowing what half of the features do but when it comes to cleaning up your audio, you’ll kick yourself in the future if you don’t learn about the Audio FX features that Premiere has to offer.
Two important Audio FX
Before we dive in to a short tutorial on what to do in order to clean up your audio, it’s worth explaining the two FX we’ll be adding to our audio file to clean it up:
- DeNoiser: This is the process of removing noise from an audio signal. This is mainly used for removing any unwanted background noise from your audio such as a fan or air-con humming behind dialogue.
- DeReverberation (DeReverb): Is the process of removing the echo from an audio signal. This is mainly used to remove echoes from dialogue.
How to clean audio in Premiere using Audio FX
Here’s how you can clean up your audio inside Premiere Pro CC without breaking the bank:
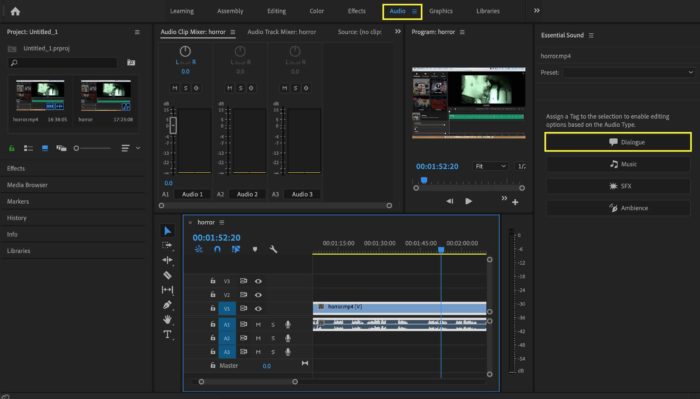
1. Go from ‘Editing’ workspace to ‘Audio’ workspace
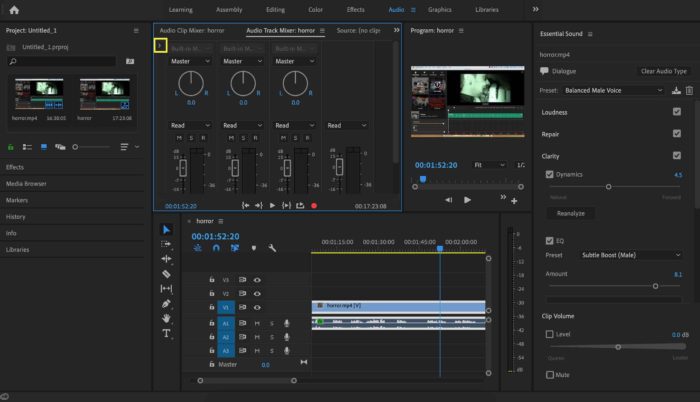
2. Select your audio clip and assign it as ‘dialogue’ from the ‘essential sound’ tab on the right and then choose the preset that suits you. In this case we opted for ‘Balanced Male Voice’.
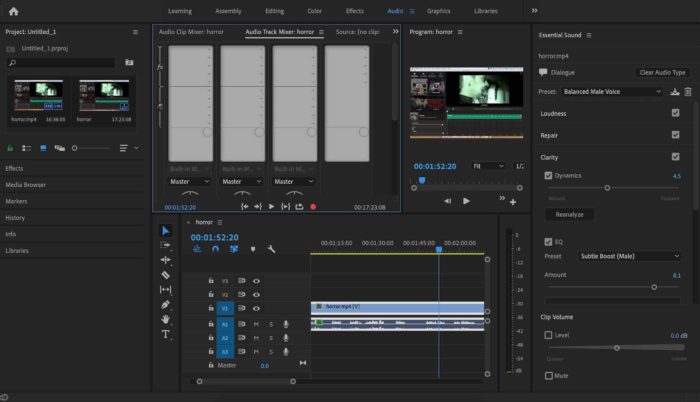
3. In the audio track mixer panel, click on the small triangle pointing to the right to pop-out the effects panel
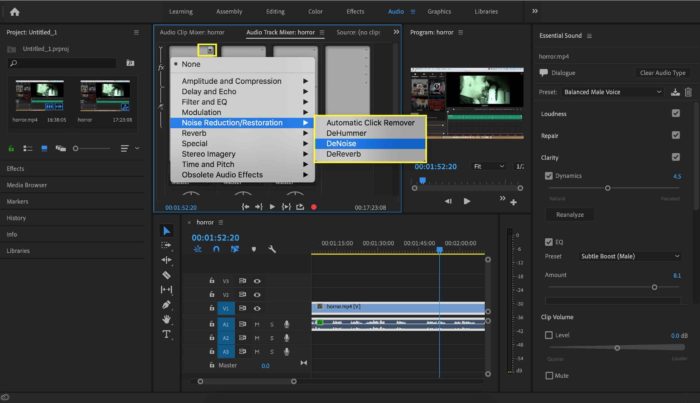
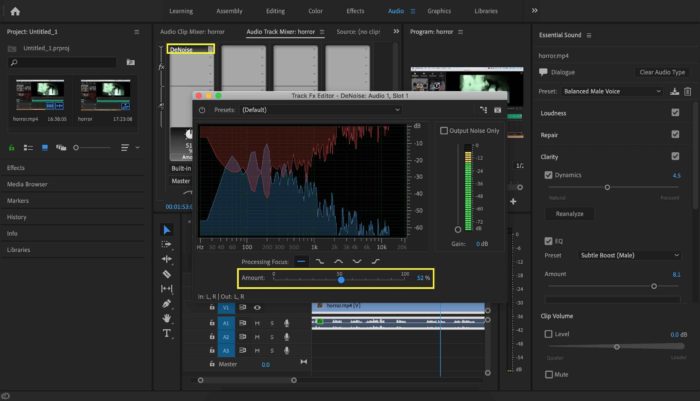
4. In the first effects panel segment add ‘DeNoise’ and then select the level of DeNoising you’d like to apply to your audio using the slider in the DeNoise FX editor
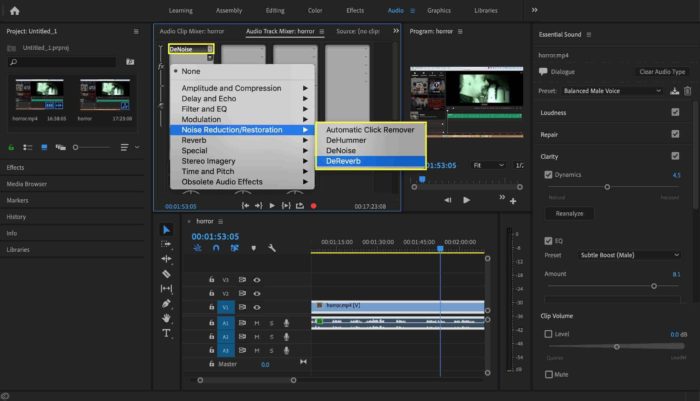
5. Add another effect in the effects panel – DeReverb – Using the slider set the level of reverb you’d like on your audio to remove the echo you may be hearing in the room
6. Make sure auto-gain is checked as this will make sure that your audio levels don’t drop too low when you are applying effects to your audio file.
If you enjoyed reading this article, don’t forget to share it with your filmmaking friends. To get Filmstro news, updates and information about competitions and giveaways you can follow us on social media.