In this article, we’ll show you how to take your footage and create a cinematic layer for Premiere Pro, to craft your video into cinematic brilliance, with four simple steps.
Colouring the footage
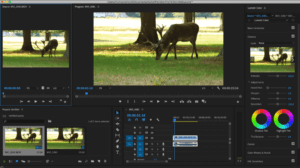
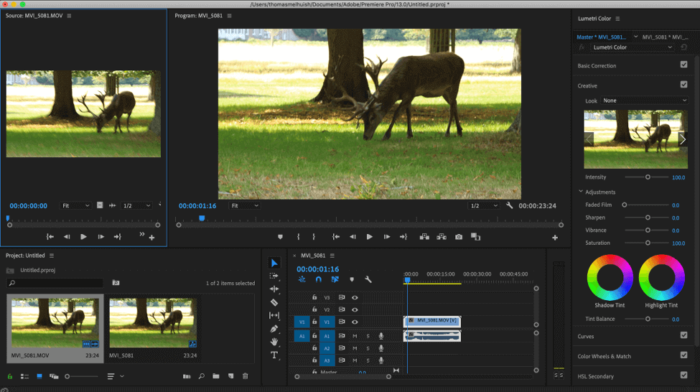
Colour grading is how you enhance or alter the colour of your video footage. Depending on the feel you are looking to achieve, you will either want to add coldness to the image or warmth. This can be done through the Lumetri scopes function.
For the cold look:
- You will want the exposure between 0.1 – 0.3.
- Reduce the shadows and the black in the clips.
- Finally, look at the temperature and point this towards the darker colours specifically the blue.
For the warmer features reverse the first two points and then add an orange tint to the temperature. This will bring out the warmth of the image, especially if you are looking to highlight the oranges and reds within the clip.
Read more: How to colour grade in Adobe Premiere Pro
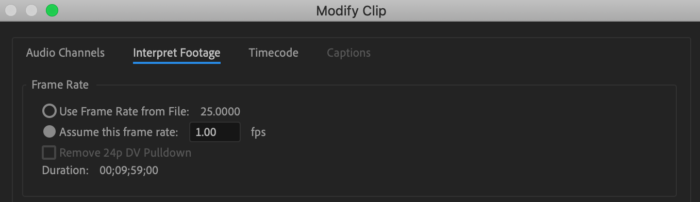
Create cinematic layer with frame rates
Reduce the fps by around 60%-65% of the current fps.
You usually would have filmed around 100-200 frames per second. This needs to be reduced to around 33fps. This will give you a smooth slow-motion feel to the footage without any judders.
To achieve this simply select your clip, right-click and go to modify clip. Then select the “interpret footage” column and click on “assume this frame rate”.
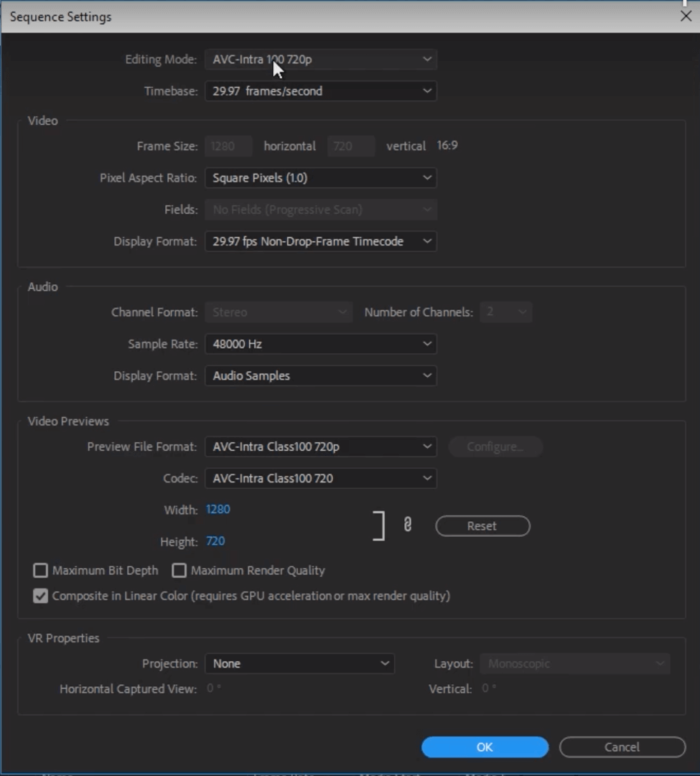
The cinematic crop
With this, you need to crop at around a 2.35:1 ratio. This is the ratio all Hollywood blockbusters and successful indie films are shown at. To do this, simply add an adjustment layer across the selected video.
Select Sequence > Sequence settings in the top bar to reveal the panel below:
Add a background track
The final step in creating a cinematic layer for Premiere Pro is adding melancholic music to complement your footage. Background music complements your footage and allows you to grab the audience’s attention, keeping them captivated. It’s essential to capture the right background track to your clip.
Read our blog on “4 top tips for choosing the right music for your film”. This will help you select the correct background music for your film to compliment the visuals.
We hope you enjoyed this article, don’t miss out on many more and sign up to Filmstro and follow us on our Twitter and YouTube channels.
Additional resources: Watch Peter Mckinnon’s Adobe Premiere Pro tutorial here.


