Editing is difficult and can take a lot of your time, but nonetheless, it’s a highly rewarding and creative process. If you’re editing a short film, animation, feature-length film or your latest YouTube series we’re here to help. From shortcuts to little tricks below, we have 5 essential Premiere Pro Tips for Indie Filmmakers. We want the process to be as efficient as possible to allow your creative thinking to take place.
Use in and out points
In and out points are the start and end of where you want to preview the clip. These can be used on the source monitor and you won’t lose any of the footage. This allows you to view different time frames and start/endpoints without having to undo the edit each time until you have perfected the points.

You can set these as shortcuts on the keyboard I and O. More on shortcuts below!
Playback Resolution
The playback resolution can slow down your editing, a lot of the time you will be previewing at the same resolution as your footage. For example, you can reduce the 1080p footage by ½ or ¼ speeding up your overall time editing.
It’s a huge strain on your system but has no impact on the quality of your final footage. On the playback monitor simply click on the bottom right-hand corner and select the quality accordingly.
Lumetri Panel
Always keep this open in the panel. It will especially help you with adjustment layers. You’ll be able to use these as you edit in real-time to ensure you have the right colour balance. This will allow you to analyse and change your colour corrections instantly, ensuring your work is at the highest quality. This will also save you time in the future as you won’t have to find the exact points by scrawling through edited footage to correct at a future time.
To find out more about colour grading and the Lumetri scopes read: How to colour grade in Premiere Pro
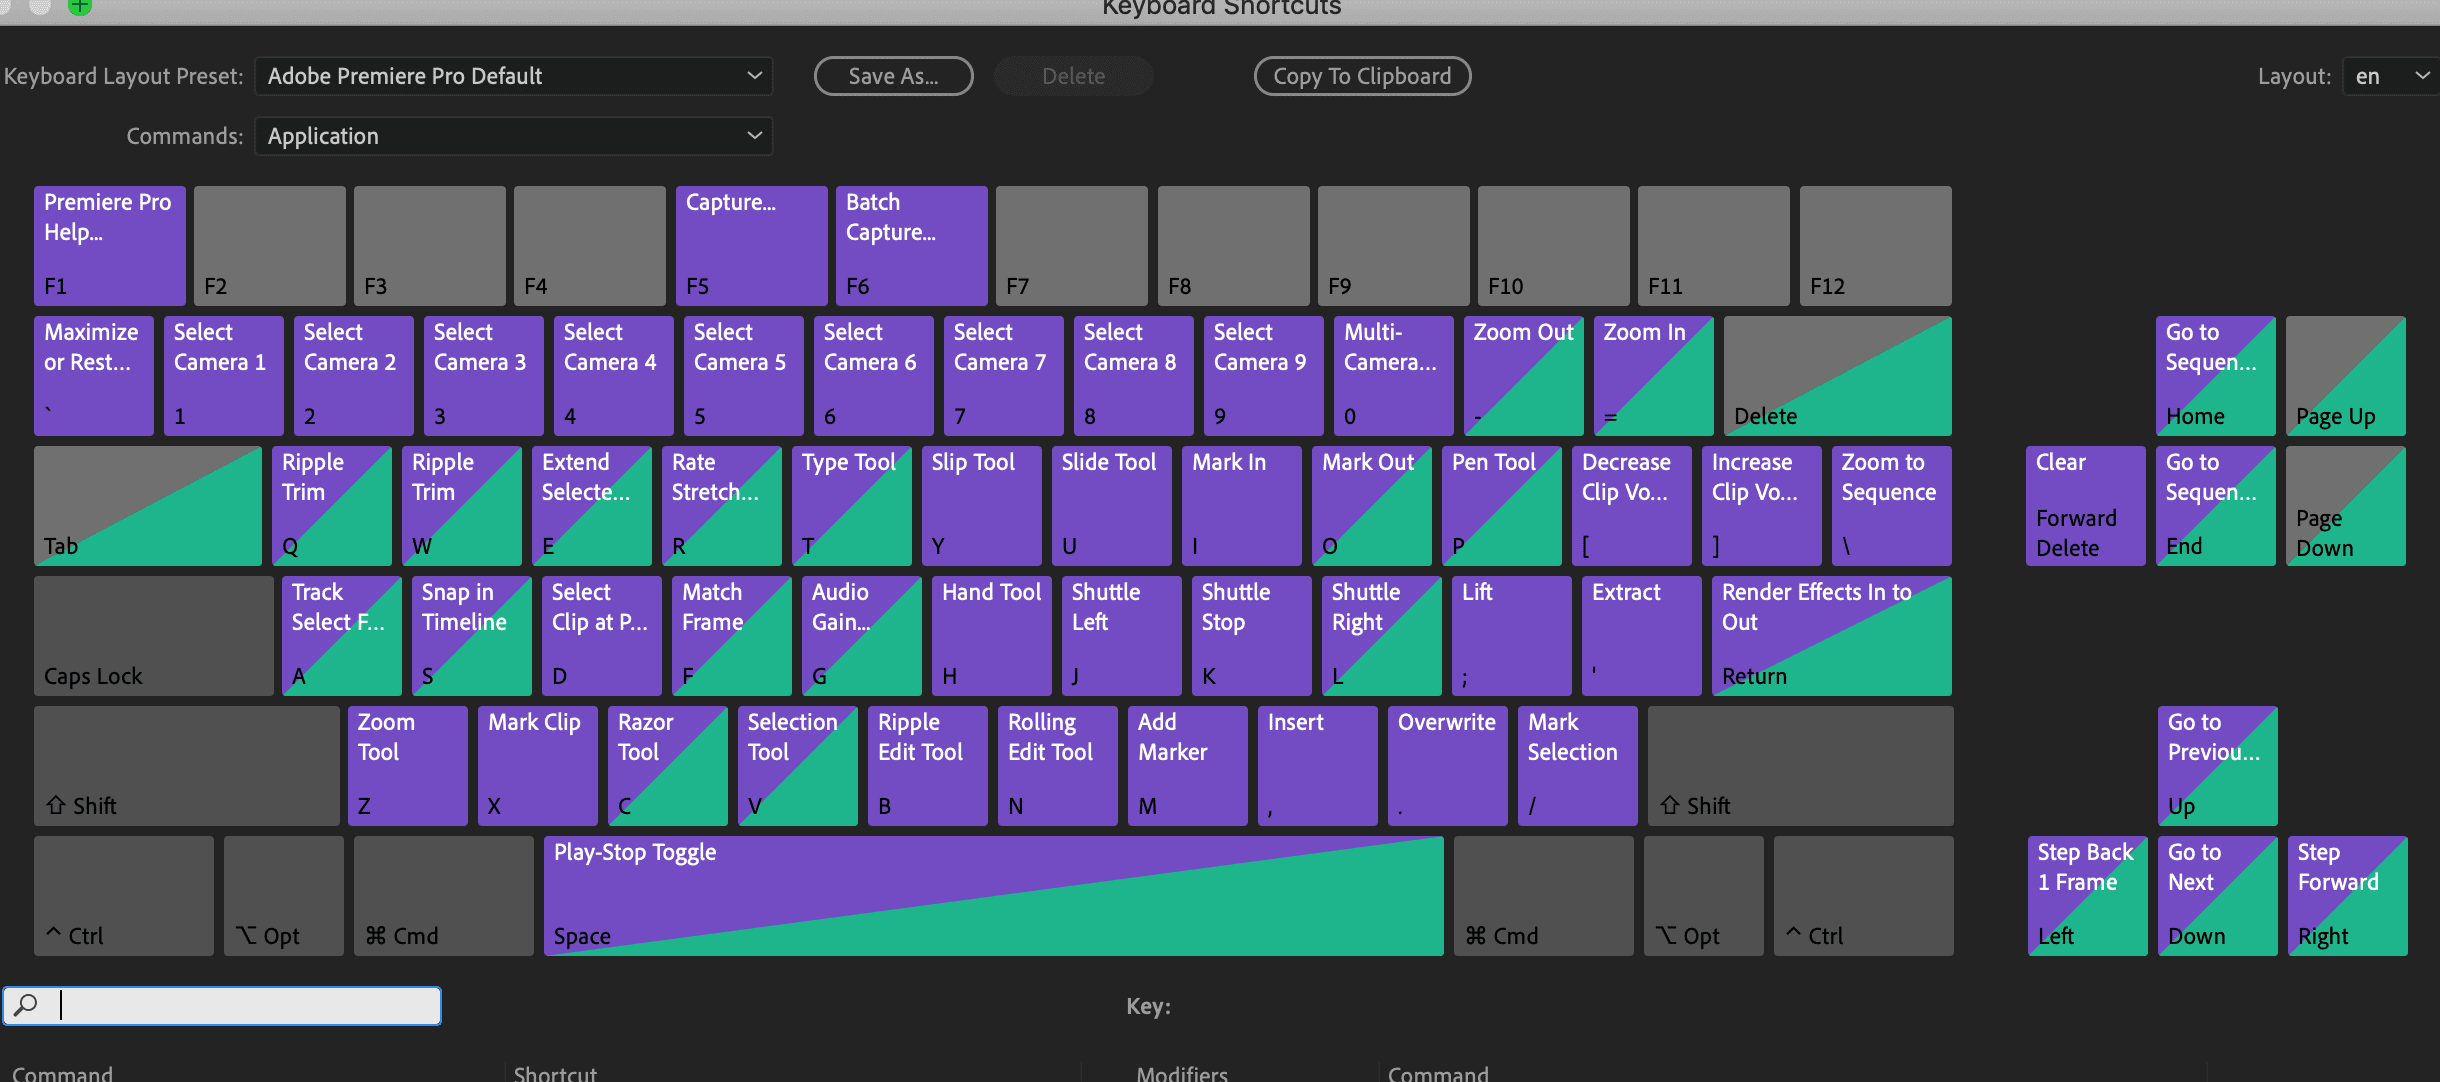
Set up Premiere Pro Shortcuts
Setting up Premiere Pro shortcuts will save you hours in the long run and allows you to spend more time on the creative process getting your final cut polished. It’s a great combination with the in and out points.
In the top left corner click Premiere pro, then scroll to keyboard shortcuts. Here you will see the below image with your shortcuts:

Now you can edit your shortcuts to your liking to suit your style and make the editing process a lot smoother.
Adjustment layers
The adjustment layers tool is essential and pretty easy to pick up. Any change you make to the adjustment layer changes across all of the footage. This saves you a lot of time, as most will edit each clip with the same effects and changes – this becomes far too time-consuming.
It can be found here by clicking new item > adjustment layers.
Once you select the adjustment layer it brings up another panel, leave all the aspects as they are and click ok. It’ll add the adjustment layer alongside your footage.
We hope you enjoyed this article on the 5 best Premiere Pro Tips for Indie Filmmakers, don’t miss out on many more and sign up to Filmstro and follow us on our Twitter and YouTube channels.


