3 Top tips for Audio effects in Adobe Premiere
Today I want to share some tips for using Audio Effects in Adobe Premiere. While Premiere isn’t as powerful as Adobe Audition, if you’re doing basic audio editing it’s more than up to the task. Also you probably know how to use Premiere already, so that’s a plus!
1) Background Noise
First off, do everything you can to reduce background noise before you start recording. Obvious right? However, we film and record in the real world with real (and often low) budgets, so studio-quality sound isn’t always possible. Maybe you’ve been forced to use a sub-standard mic, or record audio straight from the camera. So what can we do to improve our sound quality in post? The denoiser effect is a great place to start.
- Select the ‘Effects’ tab and select ‘Audio effects’. Search for ‘Denoiser’. Unsurprisingly this reduces background noise.
- Drag the effect to your clip in the timeline.
- Under the ‘Effect Controls’ tab click ‘Edit’, under custom setup for ‘Denoiser’. Don’t be afraid to tweak the values here, but I’d suggest starting with a ‘Reduction’ of -17db and an ‘Offset’ of 10.
- The ‘Lowpass’ effect can also be useful. Search for and drag the effect to the clip as we did with Denoiser. Then click edit. I’d start with a cutoff of 200hz, but again, you need to find the right settings for your audio.

Simple right? That’s really all there is to it. Hopefully we’ve made a big difference and improved your audio. If it’s still not enough, you can look at more powerful third-party options like Crumplepop’s Audiodenoise.
2) Reverb
When you talk in a large room and your voice echoes slightly? That’s reverb, or reverberation. The Reverb effect can be great for conveying a sense of space, either to reinforce a visual or to subtly hint at something that wasn’t in the shot.
- Select the ‘Effects’ tab and select ‘Audio effects’. Search for ‘Reverb’.
- Drag this to your clip in the timeline.
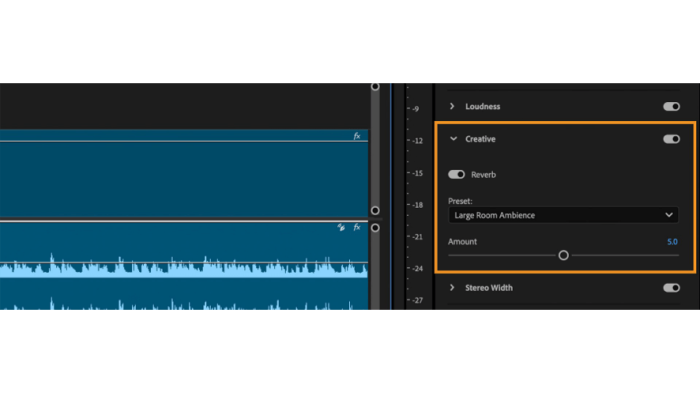
- Under the ‘Effect Controls’ tab, to the right of ‘Reverb’ is a preset button. You’ll find options like small room, large room, and church.
- If you want more control click edit and / or adjust your ‘Individual Parameters’.
A useful tip is to watch the Individual Parameters change when you select a new preset. This gives you a feel for how those changes sound in practice, and how the parameters combine. Also, don’t overdo a Reverb. A subtle effect is often best.
3) The Equaliser
Bassy audio getting you down? Large variation in the audio quality or balance between separate tracks? We can sort that out quickly and easily with the Equaliser or EQ effect.
- You know the drill by now. Select the ‘Effects’ tab and select ‘Audio effects’. Search for ‘EQ’.
- Drag the effect to your clip in the timeline.
- Under the ‘Effect Controls’ tab, to the right of ‘EQ’ is a preset button with options like Bass enhance, warm presence, high enhance and loudness.
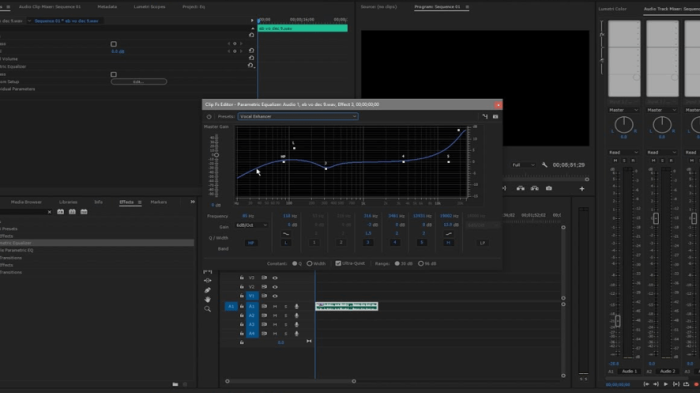
- If you want more granular control click ‘Edit’ and you’ll get a pop up box with an audio wave and adjusters for the different frequencies. The wave will be a straight line by default, but as you adjust the different frequencies, or select different presets, you’ll see the line shift to reflect your changes. So if you emphasise the bass, for example, the left-hand side of the line moves up.
The EQ effect can cover a multitude of sins, particularly if your audio equipment isn’t quite up to scratch. Plus it’s great for that final layer of professionalism that really brings a project to life.
So there we are. Three Premiere tips for the holiday season. Now you know how to use the Denoiser, the Reverb and the Equaliser effects. There are plenty more effects in Premiere so don’t be afraid to experiment! Remember, you can always select ‘Bypass’ to ignore an effect and compare to your baseline audio.
Don’t forget, if you want high-quality audio, Filmstro offers a library of royalty free music for your projects, with customisable options, all available from within Premiere. Plus, for more helpful tips for getting the most out of your projects, the Filmstro blog should be your first click.